
Mississauga's housing diversity is one of the things that makes it an interesting city to do home service work in. A condo suite on the 18th floor near Square One has completely different practical constraints than a 1970s detached home in Cooksville or a newer townhome near Winston Churchill Boulevard and Eglinton Avenue.
In high-rise buildings, elevator access, loading dock bookings, and building management rules all affect how a service visit is structured. Larger tools need to come up in a service elevator, parking may require advance arrangement, and some buildings require proof of insurance before any contractor enters. These are logistics that experienced handyman professionals plan around rather than discover on arrival.
Older detached homes — particularly those built in the 1960s and 1970s — often have plaster walls rather than standard drywall, and in some cases older wiring layouts that need to be understood before drilling or opening walls. A stud finder works differently on plaster, and knowing that before starting prevents unnecessary damage.
Handyman Services in Oakville Ontario | Repairs & Installs
Newer townhomes, which make up a significant share of residential development along the western edge of Mississauga near the Oakville border, tend to have more standardized construction. But they also often have builder-grade finishes — hollow-core doors, basic cabinet hardware, generic closet setups — that homeowners want to upgrade or improve after they settle in.
Condo units present their own category. TV mounting without permission to open walls, furniture assembly in tight spaces with narrow doorways, and fixture replacements within the scope of what building management allows are all common condo-specific jobs.
Understanding these differences is part of what separates a general handyman from a skilled residential repair specialist. The right approach depends on what kind of property you are in, not just what the job description says on paper.
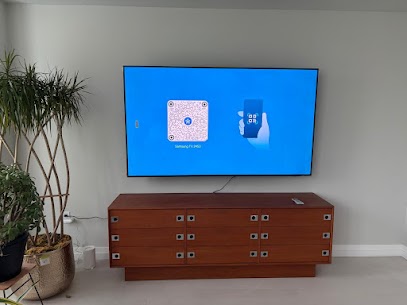
TV mounting is one of the most requested home service jobs across Mississauga, and for good reason. A properly mounted TV changes the feel of a living room, creates more floor space, and eliminates the cable mess that most homeowners dislike. Done wrong, it is also one of the more expensive mistakes to undo.
In a standard drywall wall, the process involves locating studs with a stud finder, confirming stud spacing, selecting the right mount type for the TV size and viewing angle, and driving lag bolts into the studs at the correct depth. For a 55-inch or larger TV, both studs need to be hit — spanning a single stud on a large mount is not safe.
Concrete and masonry walls, which appear in older Mississauga buildings and some ground-floor condo suites, require hammer drill bits, masonry anchors, and a different approach to bracket attachment. The principle is the same but the tools and technique differ.
Cable management is where a lot of installations fall short. Loose cables hanging down a wall undermine the clean look the mount was meant to create. Running cables through the wall using a cable channel, or installing a surface-mounted raceway, takes an extra thirty to sixty minutes but makes the finished result look intentional.
For homeowners setting up a full media wall — TV, floating shelves, a media console, and integrated cable routing — that is a multi-hour project. Planning the layout before drilling begins is essential. Measuring the wall, identifying the stud layout, marking shelf heights, and confirming outlet placement in advance saves significant time and prevents the need to fill unnecessary holes.
In most Mississauga homes we work in, the most common TV mounting issue is a previous mount installed without hitting studs properly, relying instead on drywall anchors alone. For a small TV that might hold, but for anything over 40 inches, wall anchors in drywall are not a reliable long-term solution.
Storage is a consistent pain point for homeowners and condo owners alike. Builder closets in most Mississauga homes are functional in the most basic sense — a rod and a shelf — but they waste most of the vertical and horizontal space available. A custom closet system changes that without touching the structure of the home.
A well-installed closet system adds hanging zones at two heights, dedicated shelf sections for folded items, and drawer units where space allows. The result is more usable storage in the same footprint, which matters a lot in condos and townhomes where closet space is limited.
The installation process starts with measuring the closet opening and interior dimensions accurately. Even small closets that look like standard sizes often have subtle differences — a slightly angled wall, a non-standard depth, a light fixture mounted unusually low on the ceiling. Accounting for those variations before ordering or cutting components prevents the need to rework the layout mid-install.

Most modular closet systems use a combination of wall-mounted standards and shelving components that attach to them. The critical step is finding and hitting the wall studs, since the standards carry the weight of everything below them. On a fully loaded closet with clothes, shoes, and accessories, that can be a significant load.
Walk-in closets, which are common in larger Mississauga detached homes and master bedrooms in newer builds, benefit most from a zoned layout — separate areas for hanging, shelving, and accessories — rather than treating the whole space as one undifferentiated room.
For homeowners in Mississauga who have been tolerating an overloaded or disorganized closet, this is typically a one-visit job. A professional installation with the right components results in a closet that is genuinely more functional and that feels like a finished part of the home rather than an afterthought.
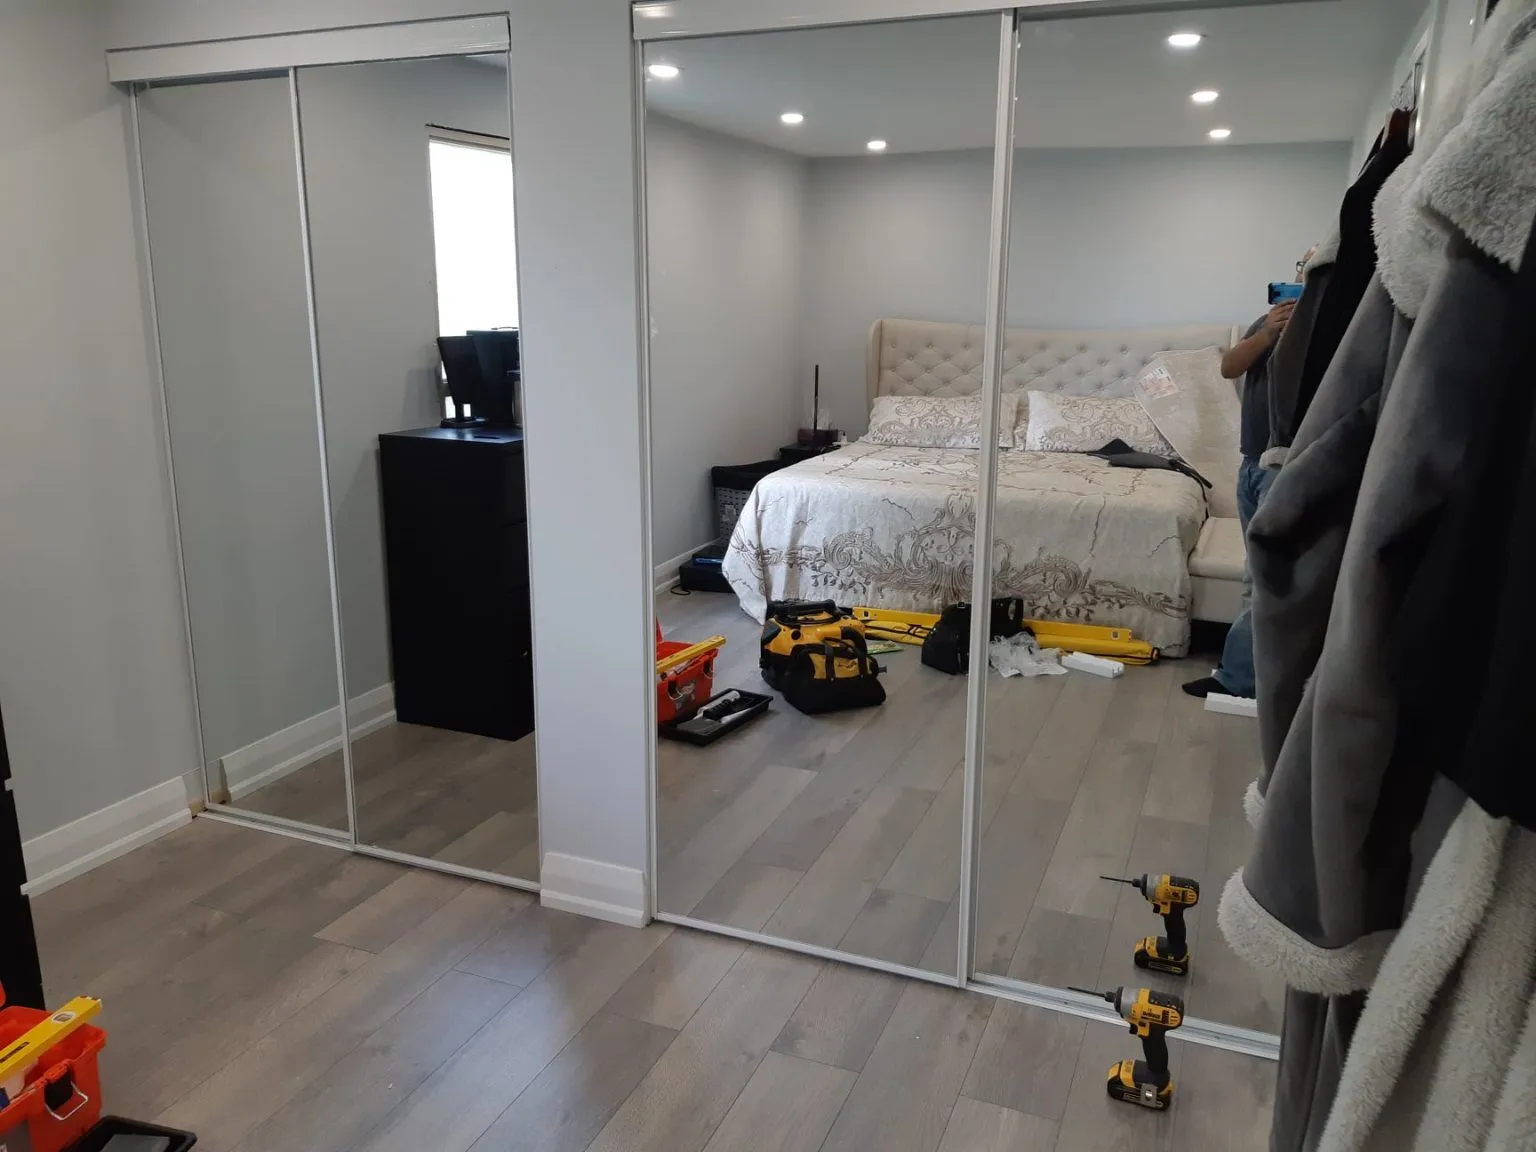
Sliding mirror doors are a fixture in a huge number of Mississauga homes, particularly those built between the 1980s and early 2000s. They were standard in bedrooms and closets for decades, and while they still do the job visually — adding light and perceived space to a room — the hardware wears out over time and eventually causes problems.
The most common issue is a door that drags, jumps the bottom track, or tilts noticeably when open. In almost every case, the culprit is a worn top roller. The roller develops a flat spot from years of use, which causes the door to ride unevenly. Replacing the roller — which involves removing the door from the track, swapping the hardware, and reinstalling — typically takes less than an hour.
Bottom guides also crack and break, especially the plastic varieties found in older installations. A broken bottom guide causes the door to sway and drag against the door frame or the adjacent panel. Replacement guides are inexpensive, but getting the right size matters — measuring the track width before ordering prevents buying the wrong part.
For new sliding mirror door installations, the most important step is getting the top track level before anything else is mounted. Even a few millimetres of deviation will cause the door to drift toward one end of the track, making it impossible to leave the door at a chosen position. A four-foot level and careful shimming during installation saves a lot of adjustment time later.
In condos and apartments with older original door hardware, matching the replacement parts to the existing track system requires some investigation. Different manufacturers used different roller profiles, and not all modern replacement parts are universal. Knowing what to look for and where to source compatible hardware is part of the expertise involved.
Homeowners who have been leaving a broken sliding door open because it is too difficult to close and open smoothly should not have to live with that. It is a short repair with a meaningful impact on daily use of the space.
Flat-pack furniture is everywhere in Mississauga homes. IKEA, Wayfair, Article, and similar brands have made affordable, stylish furniture accessible — but the trade-off is assembly. For single items, many homeowners manage fine. For large pieces, complex items, or a sequence of furniture that needs to be assembled and placed before a move-in deadline, professional assembly makes a real difference.
A standard wardrobe assembly — the kind with two doors, three drawers, and an internal fitting kit — typically takes two to three hours done properly. That includes verifying square during assembly, not just at the end. A wardrobe that is slightly out of square will have doors that do not align at the top and bottom, a problem that is much easier to correct during assembly than after it is complete.
Bed frames, especially high-loft or bunk configurations, have longer instruction sets and more components than they appear to. The critical points are the structural connections — the joints that carry weight — which need to be properly tightened with the correct torque, not just snugged by hand. Hardware that is under-tightened on a bed frame works loose over weeks of use.


Dining tables and office desks are relatively straightforward but have the same core requirement: level and square. A table that wobbles on a flat floor was assembled with at least one leg attachment that is slightly misaligned. Catching and correcting that during assembly, rather than after, is a matter of procedure.
For homeowners who have just moved into a Mississauga home or condo and need multiple pieces assembled at once — a bed frame, a wardrobe, a desk, a bookshelf — a single professional assembly visit covers all of it in sequence, efficiently and without the pressure of doing it alone against a tight deadline.
Home appliance repair is one of the areas where homeowners most often default to assuming a replacement is necessary when a repair would actually solve the problem. In most cases of a single component failure, repair is the smarter financial choice — especially for appliances under ten years old.
A dryer that runs continuously but produces no heat is one of the most common appliance repair calls. In most cases, the thermal fuse has blown — a safety component that cuts power to the heating element if the dryer gets too hot, which usually happens because a clogged exhaust duct restricted airflow. The repair involves replacing the fuse and clearing the duct. Skipping the duct cleaning means the new fuse will fail again within weeks.
Dishwashers that do not drain properly typically have one of two problems: a clogged filter or a failed drain pump. The filter is a homeowner maintenance task — it should be cleaned monthly but often goes years without attention. A failed drain pump is a replacement job. Testing the pump before ordering parts confirms which issue is present.
Refrigerators that are running but not cooling efficiently are often suffering from a dirty condenser coil — a straightforward cleaning job — or a failing evaporator fan. Both are diagnosable without specialized equipment and repairable without replacing the unit.
Light fixture replacements and outlet upgrades are regular jobs in Mississauga homes, particularly in older properties where original fixtures are outdated or where homeowners want to modernize the look of a kitchen or bathroom. Replacing a vanity light bar, installing a ceiling fan in a bedroom, or swapping a two-prong outlet for a grounded three-prong outlet are all within handyman scope.
Homeowners should work with professionals who take electrical safety seriously, particularly when working around outlets and fixtures. Many Mississauga residents prefer to use experienced service providers when any electrical component is involved, and that preference is reasonable and worth acting on.
Drywall repair is the category of home maintenance that gets deferred the most. A hole from a doorknob, a few anchor patches left from a previous renter, a section removed for a plumbing repair — these things sit on the list for months because they feel like small jobs but have enough steps that they get pushed aside.
A small hole under two inches can be filled with a setting-type compound, sanded smooth after curing, primed, and painted in a single visit. Larger holes — anything over three or four inches — need a backer board or a California patch to give the compound something to adhere to before it dries. Without backing, the compound cracks as it dries and the repair fails.
Texture matching is the most difficult part of any drywall patch. Smooth walls are the simplest to match. Orange peel texture can be replicated with a spray can or a small compressor and hopper gun. Knockdown texture requires applying compound with a drywall knife and then lightly dragging to flatten the peaks before it dries fully. Getting the density and pattern right takes practice.
In many Mississauga condos and apartments, walls are smooth — which makes texture matching less of an issue but puts a premium on perfectly smooth, flat compound work. Any low spot or ridge in the compound will show through the paint.


Primer is not optional on a patched section. New compound is highly porous compared to the existing painted surface, and without a primer coat, the paint soaks in unevenly and the repair is visible even with a perfect colour match.
For landlords managing rental properties in Mississauga, drywall touch-up between tenants is a routine cost of doing business. Addressing it before listing — rather than leaving it for potential tenants to notice — is a straightforward investment in how the property presents.
Owning a home in Oakville means keeping up with a steady list of small repairs and installations that seem simple on their own but pile up fast. A cabinet hinge that squeaks, a sliding door that jumps its track, a TV still sitting on the floor because the wall mounting never got done — these things matter more than they seem. Left too long, minor issues become bigger ones, and bigger ones cost more to fix.
Homeowners across Oakville, from the older streets of Old Oakville near Lakeshore Road to newer builds in Joshua Creek and Iroquois Ridge, deal with the same reality: finding reliable, skilled handyman services in Oakville Ontario that actually show up, communicate clearly, and finish the job right. That is what Handyman Oakville Ontario was built to do.
This guide walks through the most common repair and installation needs for Oakville homeowners, what to expect from professional home service, and how to decide when it makes sense to handle something yourself versus when calling a local handyman is the smarter move.
The list of tasks that fall into handyman territory is longer than most people realize. It is not just emergency repairs — it is the ongoing category of jobs that are too involved for a quick DIY fix but do not require a licensed contractor or a full renovation crew.
Explore our latest resources, guides, and helpful information.